Water level QDY30B
Vandens lygio matuoklis paremtas QDY30B sensoriumi. Pagrindinė sprendžiama problema: hidroforo išjungimas pasiekus kritinį vandens lygio tašką, t.y kai hidroforo įėimo vamzdis nepasiekia vandens išjungti jam maitinimą. Taip pat papildomai integracija į MQTT/Home Assistant vandens lygio matavimams centimetrais/metrais.
Reikalingos medžiagos
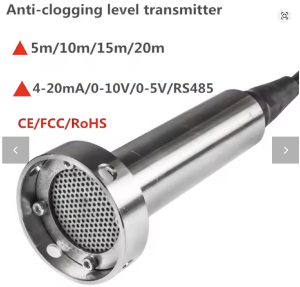
- Submersible Liquid Level Sensor Water Tank Pressure Transmitter 4-20mA 0-10V RS485 Water River Level Transmitter šiame aprašyme naudojamas 4-20mA output, 5M range 10m cable
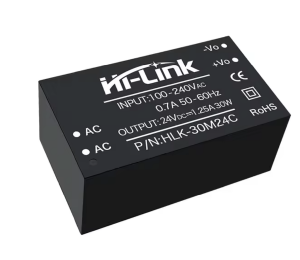
- Hi-Link 30W 24 AC DC Single Output Power Supply Module HLK-30M24C
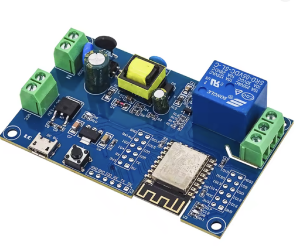
- ESP8266 WIFI Wireless Relay Module ESP-12F AC 220V DC 5V 12V Power Supply ESP 12F Development Board Remote Control Smart Home modulis su ESP-12F
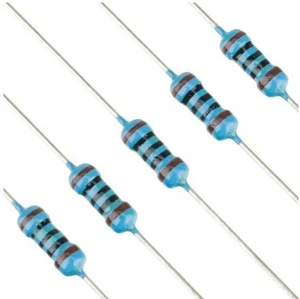
- Metal Film Resistor 2W 47R tipas 2W 47R
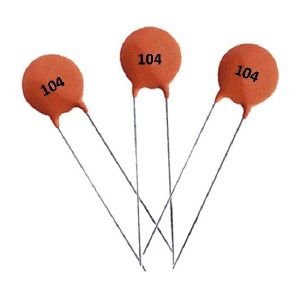
- Ceramic Capacitor 104 0.1uF 100NF 50V tipas 104
- Bet kokia elektros paskirstymo hermetinė IP66 dėžutė iš Senukų arba Ermitažo (kad tilptų viskas sugrūsti).
Kaip atrodo medžiagos
Sujungimo schema
  From Sensor (Blue wire, 4–20 mA −)
           │
           │
           ├───────> To ESP8266 ADC0 (A0)   ← sense wire
           │
           │
         [===]  ← 47 Ω resistor (shunt)
         [   ]
           │
           │
          GND  (shared with 24 V PSU and ESP8266)
Sujungimas:
- Prijungiame mėlyną sensoriaus laidą prie vienos 50R rezistoriaus kojos.
- Kitą rezistoriaus koją prijungiame prie žemės (GND).
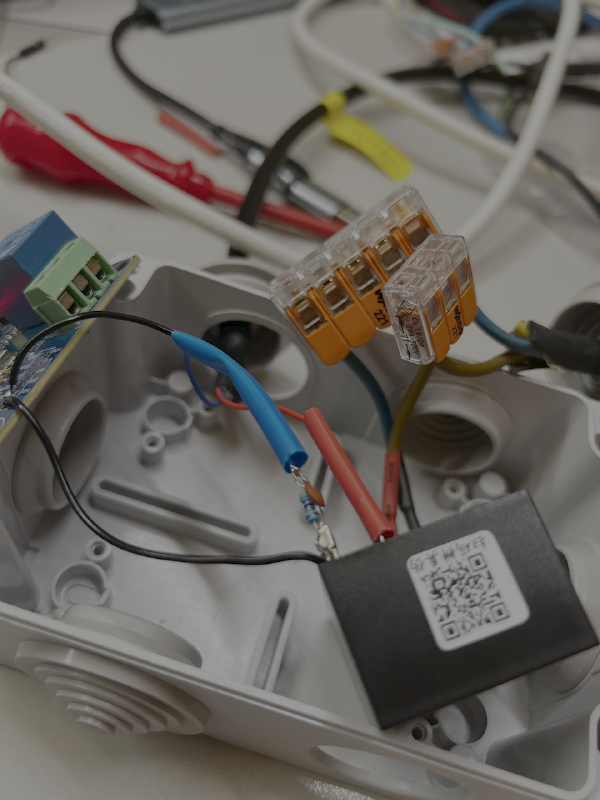
- Prilituojame keramikinį kondensatorių tiesiai per abi rezistoriaus kojas (lygiagrečiai).
- Nuo mėlyno laido pusės (kur prijungtas prie rezistoriaus) išvedame trumpą laidą į ESP8266 ADC0 (A0) įėjimą.
- Įsitikiname, kad maitinimo šaltinis (PSU) ir ESP8266 turi bendrą žemę (GND).
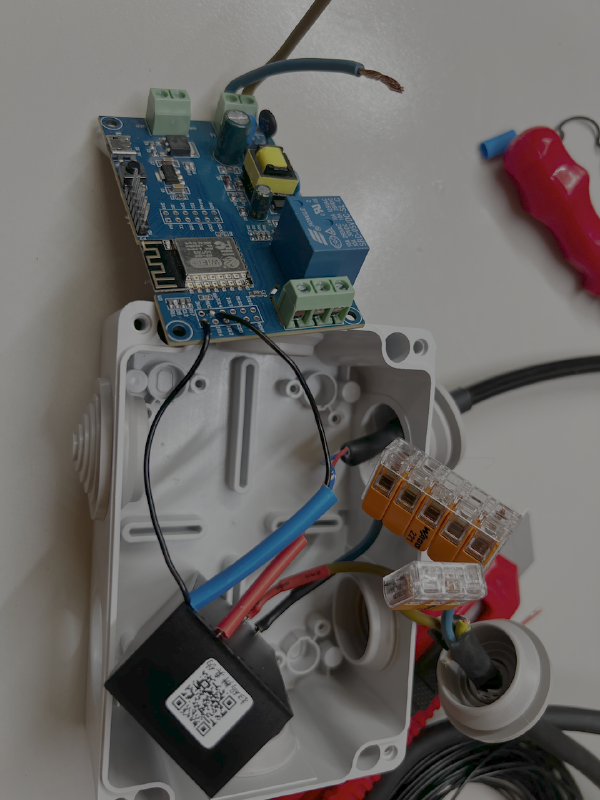
Kaip atrodo sujungimas
ESPHome Firmware kodas
water_level.yaml
Pagrindinis esphome aprašas/kodas:
substitutions:
  device_name: waterlevel-qdy30b
  friendly_name: "Water Level"
  r_shunt_ohm: "47.0"         # 47 Ω
  max_depth_m: "5.0"          # probe range max (meters)
  zero_offset_cm: "-6.0"      # offset calibration: 33 → 27 cm, so -6 cm
  threshold_max_cm: "500.0"   # 5.0 m × 100 = 500 cm
  relay_gpio: GPIO15          # Board relay pin which is soldered to

esphome:
  name: ${device_name}
  on_boot:
    priority: 800
    then:
      - delay: 500ms
      - lambda: |-
          id(apply_control).execute();
preferences:
  flash_write_interval: 10s

esp8266:
  board: esp12e
  restore_from_flash: true     # restore states after power off

wifi:
  ssid: !secret wifi_ap
  password: !secret wifi_password
  ap:                      # fallback AP if Wi-Fi fails
    ssid: "${device_name}_AP"
    password: !secret wifi_direct

mqtt:
  broker: !secret mqtt_broker
  client_id: ${device_name}-client
  username: water_level
  password: MyMQTTPassword
  discovery: true

logger:
ota:
  - platform: esphome
web_server:               # small built-in web page for quick checks
  port: 80


# --- RELAY (physical output) ---
switch:
  - platform: gpio
    id: pump_relay
    name: "${friendly_name} Relay"
    pin:
      number: ${relay_gpio}
      inverted: false        # set to true if your relay is active-LOW
    restore_mode: RESTORE_DEFAULT_OFF   # restores last known state (if none saved, default OFF)

  - platform: template
    id: auto_enable
    name: "${friendly_name} Pump Automation"
    optimistic: true
    restore_mode: RESTORE_DEFAULT_OFF  # restores last saved; defaults OFF if none yet
    turn_on_action:
      - lambda: |-
          id(apply_control).execute();
    turn_off_action:
      - logger.log: "Automation disabled — relay left unchanged."


# --- SENSORS ---
sensor:
  # Raw voltage across the shunt (A0 is 0..1.0 V on ESP12F)
  - platform: adc
    pin: A0
    id: loop_voltage
    name: "${friendly_name} Loop Voltage"
    unit_of_measurement: "V"
    accuracy_decimals: 3
    update_interval: 1s
    filters:
      # light smoothing; A0 can be a bit noisy
      - median:
          window_size: 7
          send_every: 3
          send_first_at: 1

  # Convert V -> current (mA): I = V / R * 1000
  - platform: template
    id: loop_current
    name: "${friendly_name} Loop Current"
    unit_of_measurement: "mA"
    accuracy_decimals: 2
    update_interval: 1s
    lambda: |-
      return (id(loop_voltage).state / ${r_shunt_ohm}) * 1000.0;
    filters:
      # keep values in a sane range
      - clamp:
          min_value: 0.0
          max_value: 30.0

  - platform: wifi_signal
    name: "${friendly_name} WiFi RSSI"
    update_interval: 30s
  - platform: uptime
    name: "${friendly_name} Uptime"

# Depth in centimeters (from the computed meters)
  - platform: template
    id: water_depth_cm
    name: "${friendly_name} Depth CM"
    unit_of_measurement: "cm"
    device_class: distance
    state_class: measurement
    accuracy_decimals: 0            # whole centimeters; set 1 if you want 0.1 cm
    update_interval: 1s
    lambda: |-
      // reuse the meters reading we already compute
      return id(water_depth).state * 100.0;
    on_value:
      then:
        - lambda: |-
            id(apply_control).execute();

  # Map 4–20 mA to 0–MAX_DEPTH meters
  - platform: template
    id: water_depth
    name: "${friendly_name} Depth"
    unit_of_measurement: "m"
    accuracy_decimals: 2
    update_interval: 1s
    lambda: |-
      const float I = id(loop_current).state; // mA
      float d = (I - 4.0f) / 16.0f * ${max_depth_m}; // ideal meters
      d += (${zero_offset_cm} / 100.0f);             // apply offset in meters
      if (d < 0.0f) d = 0.0f;
      if (d > ${max_depth_m}) d = ${max_depth_m};
      return d;
    filters:
      - throttle: 1s


number:
  - platform: template
    id: threshold_cm
    name: "${friendly_name} Threshold (cm)"
    min_value: 0.0
    max_value: ${threshold_max_cm}   # must be a number, not a lambda
    step: 1.0
    optimistic: true
    restore_value: true
    initial_value: 30.0
    set_action:
      - lambda: |-
          id(apply_control).execute();

# Optional: handy extras
text_sensor:
  - platform: wifi_info
    ip_address:
      name: "${friendly_name} IP"

script:
  - id: apply_control
    mode: restart
    then:
      - if:
          condition:
            switch.is_on: auto_enable
          then:
            - if:
                condition:
                  lambda: |-
                    return id(water_depth_cm).state > id(threshold_cm).state;
                then:
                  - if:
                      condition:
                        switch.is_off: pump_relay
                      then:
                        - logger.log: "Automation: depth > threshold → Relay ON"
                        - switch.turn_on: pump_relay
                else:
                  - if:
                      condition:
                        switch.is_on: pump_relay
                      then:
                        - logger.log: "Automation: depth ≤ threshold → Relay OFF"
                        - switch.turn_off: pump_relay
          else:
            - logger.log: "Automation disabled — no action taken."
secrets.yaml
Šiame faile aprašoma wifi/mqtt/slaptažodžiai.
wifi_ap: SSID
wifi_password: 123456789
wifi_direct: 123456789
mqtt_broker: 192.168.1.1
Flashinimas
Pirmiausia reiktų susidiegti esphome python3 modulį:
pip3 install esphome
Flashinti reikia per relės UART interfeisą, micro USB interfeisas tam reikalui neskirtas. Pajungiame USB Serial TTL adapterį, sujungiame RX/TX/GND/5V ir galime flashinti, pirmam kartui taip pat būtina užtrumpinti GND + 101 prieš įjungiant įrenginį (randasi tame pačiame UART layoute).
Norint, kad veiktų rėlė taip pat reikia sulituoti kartu pinus: Relay + 1015.
Kompiluojame ir flashiname:
python3 -m esphome compile water_level.yaml
python3 -m esphome upload water_level.yaml
Vėliau galime flashinti over the air (per tinklą) metodu:
python3 -m esphome upload --device DEVICE_IP water_level.yaml
Rezultatas
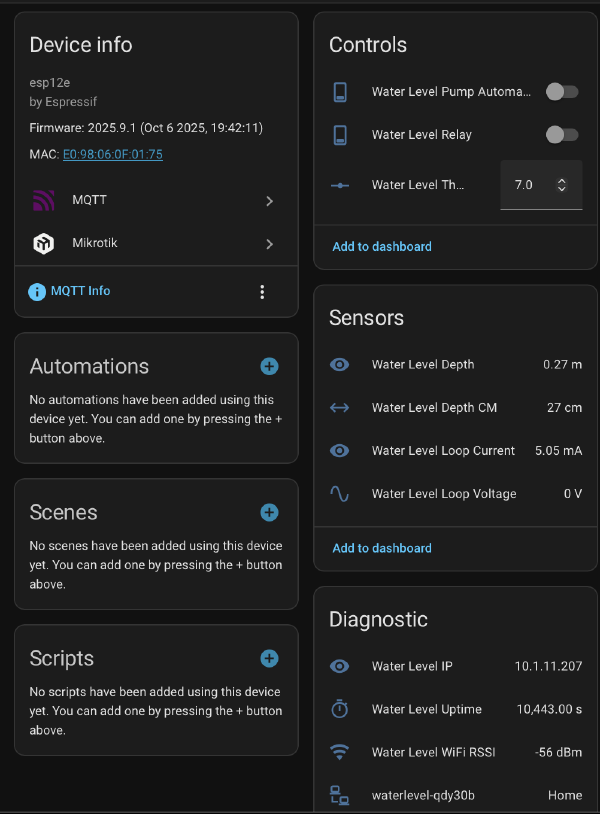
Kaip matome galime nustatyti kiek CM yra kritinis taškas, žemiau jo relė išsijungia, taip pat galima šią automatiką išjungti arba įjungti. Įjungimo išjungimo būsenos tai pat saugomos po power loss ar atsitiktinių elektros atjungimų, kas yra būtina išlaikant testinumą. Taipogi galima rankiniu būdu valdyti rėlę prieš tai išjungus automatiką. Pagal nutylėjimą pirmam leidimui visos pozicijos yra išjungtos.
